Sunday 13 May 2012
Wiered Science
I created this card from Craft Artist and the Steampunk Inventor digi kit and a few embellishments from one of the other steampunk digi kits. I'm trying to get a look of mad scientist/inventor as the card if a student going to do his PHD in one of the sciences. Hence the bottles and vials on the shelves which i placed and grouped so that I could move them to where I wanted.

I finished by glazing the bottles but this was done as an after thought and after the photos were taken

Saturday 12 May 2012
Forever friends Mum

I created this card using Do crafts digital Designer for the backing paper the greeting and the border. The papers are from Tulip and friends. I used the digital punches on the striped paper to create a greeting mat for Mum. I used a decoupage image from the Forever friends and matted it onto the large lacy Oval I also embossed this with a Forever friends embossing folder
Friday 11 May 2012
Deepest Sympathy Angel

This card I created using Craft Artist I used a faded pink background the angel I added through the photo section and used the tear drop punch for the shape I used the blend mode to fade it into the background added the greeting and verse and printed it out I then re printed the Angel three times to get my decoupage layers and finished with a spellbinder border from Damask accents
Thursday 10 May 2012
Heartfelt Sympathy
Wednesday 9 May 2012
Polka Doodles Pretty Sweet

Polka Doodles again! I created this card using Craft Artist for the greeting and the background I just love these two colours together I printed one of the characters from the Polka Doodles CD Pretty Sweet and the flowers I used a X cut punch in matching colours I curled the petals before sticking them down.
Tuesday 8 May 2012
Flourishes and Feathers


I used MCS for create this card but the main image I took from Polka Doodles Cherish CD I altered the colour to match the feather. I made up the envelope and card, used a spare from my spellbinder bitty box ( bits thst I have cut but not used) and finished with a large gem and three small ones which I coloured with a Promarker.
Monday 7 May 2012
Lipstick, brushes & Button

I wanted to play with Colours in Craft Artist particularly Pinks, Oranges & Greens. I decided t9o use Ladies Night and Botanique Digi Kits they had the colours I liked. I created the background Ribbons, Buttons, Materials and flourish with Botanique and the rest from Ladies Night I designed the brushed and lipstick pots using materials from Botanique placed the ribbons on the card along with the flourish I added the brushes, lipsticks and placed them behind the pots. I used the buttons and added a gem between them and personalised with a name. I added the text and added a few more faux pearls which i re coloured using the fill tool I finished by adding ear rings I printed the card. I then removed all the layers except the buttons and one earring which i then printed again to use as decoupage. I added glaze to these then put the card together.
Sunday 6 May 2012
Little Monster Birthday

This is my Grandsons card he is into Moshi Monsters so I created this card in Craft Artist using the Monsters Digi kit it is absolutly full of embellishments that will go with any birthday the wording is from one of the American digi kits.
I used the shadow tool to give the effect they were standing off the page and I added googly eyes on the largest of the three monsters. I would recomend this kit to anyone who has a little monster or two.
Saturday 5 May 2012
Babys first Scrapbook page
A Scrapbooke page I created for a friend She had seen a few of mine I had done with my Grandchildren So i created this one using several of the baby digi kits I used the blend mode on two of the photos just hours old and bathtime the other three I added to the intelligent digi frames and added a few embellishments and a tag with his name.
Friday 4 May 2012
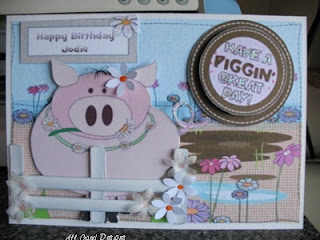
Piggin Great with Polka Doodles
I used my Polka doodles CD (Back to Nature) for this card I printed everything from the CD and put it together the actual birthday greeting I did with one of the blank lables I took it into MCS and added text. I just love the Polka Doodles CDs
Thursday 3 May 2012
Harry's Army
I created this card using MCS I printed out the images and backing paper. I made the middle stepper card added the images and for the greeting I used stamp Cuttlebug alpha dies and peeloffs
Wednesday 2 May 2012
Fushias
Tuesday 1 May 2012
Mum
I created this card using MCS and one of the many CDs I have of theirs I decided on the image printed the greeting and the flowers onto the base card. I then printed out the flowers only so that I could decoupge them onto the card
Monday 30 April 2012
Spellbinders and Pazzles meet

I created this A4 card using my beloved Pazzles and some of my Spellbinders
Bitty Blossoms,
Ribbon buckles
Romantic Rectangles
A3 card to fold as the main card base
Pink card
Black sparkle paper
Length of black ribbon
I cut the 18 with my Pazzles from an A4 pink card I backed it with foam tape. I prepared the Card base and stuck the black sparkle paper to the front.
I then cut the Buckle, Bitty blossoms, leaves and the greeting plate which I had printed out. made up the blossoms drew round cut an extra mat from the romantic rectangle I had used for the greeting, I then started to make the card I threaded the ribbon through the buckle and stuck it to the pink piece of card, then stuck this to the card base I decided were I wanted to place the blossoms and stuck them into place added the greeting to the mat and placed this onto the card. I finished with some glitter and a gem for the middle of the buckle.
Sunday 29 April 2012
Voucher Wallet
I created this wallet for a Voucher I used cream card placed the voucher onto the card and using a creasing board embossed double lines were I wanted the wallet to fold corner round scissors for the corners of the flap also my crafters companion ultimate to add the fancy edge on the flap. I decorated the flap with tapestry stamps ( Garden of Bee Balm) I have not used these in a while and decided to play I finished with a little glitter and a Brown piece of tape which made a bow at one end and used it as a wrap around
Saturday 28 April 2012
Fancy Spellbinder
Another fancy fold concept from Sue Wilson. I used my new dies "Wings of Hope", Samantha Walker's "Antique Frames and Accents" , "Damask Accents" and a Papermania Sister stamp.
I decided to create a tone on tone card using to types of cream card one matt and one pearlised.
The tutorial for the fancy fold is on Sue Wilson's Blog "Parti crafts" and is list on the right side of my blog. I cut the border and liked the negative pieces that i also used both side and raised the actual border slightly as you
can use little bitty foam squares to stick it down. I coloured the butterfly while it was still in the die with Antique linen distress ink and it just gave a slight shadow effect. The sister stamp I used Adirondack Woodlands ink its a rainbow ink pad with four beautiful earth tones I used the brown and peachy colour I then cut it out sprayed it with adhesive and covered it with crystal glitter I stamped the greeting using the same Adirondack ink to the centre panel. and finished with Cosmic Shimmer PVA dark bronze and Olympic gold.
Thanks
Julie
Subscribe to:
Posts (Atom)
Hi Crafty Friends, I'm finally back in cold Scotland and waiting for the warm weather to appear. I am now starting work on my dragon jo...
-
6 When you have your polythene in place and stuck with sellotape you can fix the two pieces of card ( should be face up )to the polythene st...
-
I was asked to make a Fun card for a 40th Anniversary that looked like a rosette or medal and came upi with this. I used a mixture of Spell...
-
I got some friendly Plastic from the SSEC and decided to let Cara and Connel My Grandchildren make a braclet for Mummy to go with the card t...


